
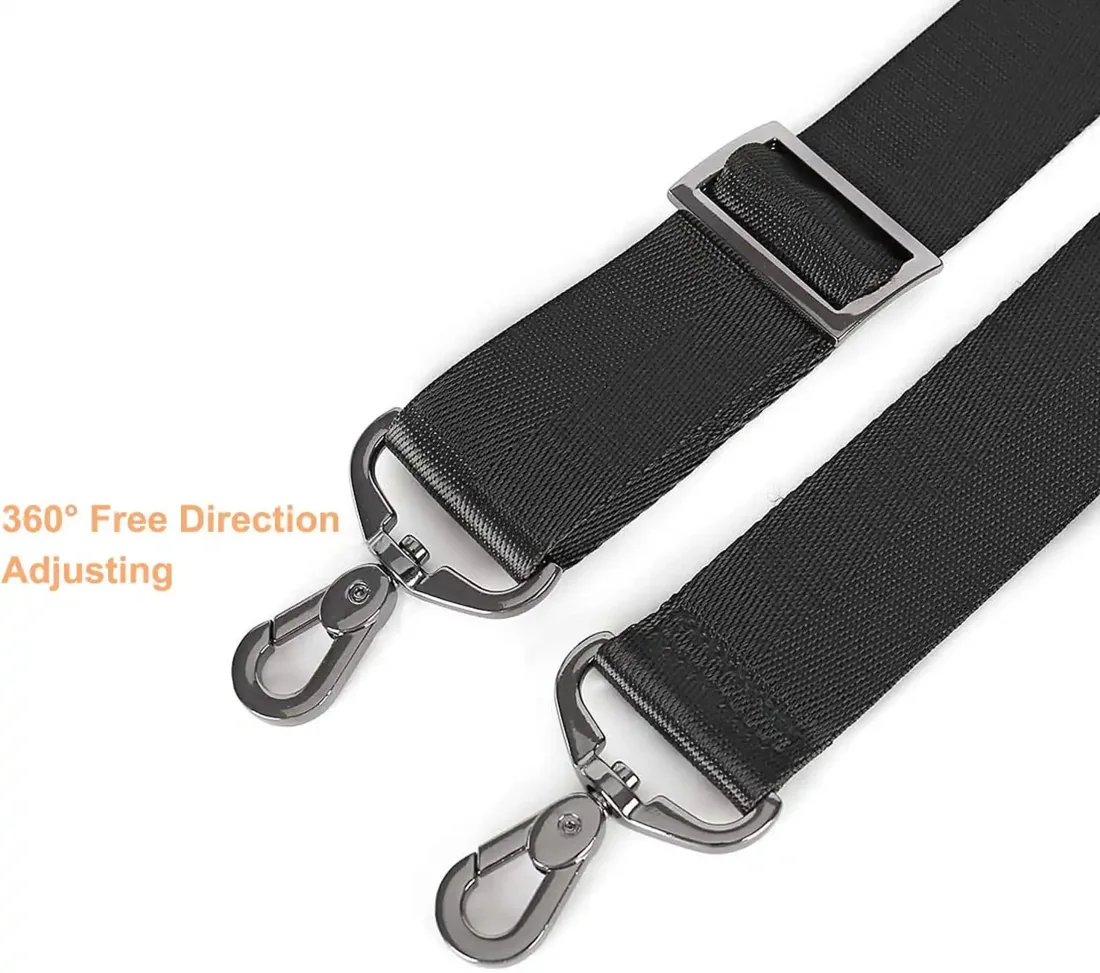
Custom shoulder straps need a specification for the whole assembly. Begin with the shortest and longest finished settings, the tape dimensions, the hardware connections and the position of any padding. The useful question at sample stage is whether that exact combination fits the bag and carries in the arrangement you intended.
A reference photograph can start the conversation. For an order, turn it into a drawing and a short purchasing sheet. That gives the bag buyer, component supplier and sample reviewer something specific to discuss when a length, opening or finish needs to change.
What does “the same strap” mean for this order?
Imagine a brief that asks for the same strap in a new colour. As an illustrative buying request, it leaves several decisions open. Which bag will receive it? Does the requested length include the clips? Should the padded section stay in the same place? Which attachment detail in the photograph needs to be matched?
Resolve those questions on a complete view of the accessory. Show the bag with the strap attached, then show the strap laid out so its components can be seen. Identify what the quote should include, such as clips, an adjuster, a padded section and any requested artwork. List the quantities for each version separately.
The carrying arrangement belongs in this brief too. Specify the shoulder or crossbody position you want the sample reviewer to try, and identify the actual bag or representative sample available for that fitting.
A length range needs marked endpoints
“Longer” is useful feedback only after the measurement has been agreed. Draw the minimum and maximum settings and mark the start and end of each measurement. Include the attachment hardware in the drawing, with a clear indication of whether it is included in the stated length. Keep one measurement unit across the sheet.
The adjustment range can then be reviewed on the bag. At each requested setting, look at the position of the strap and loose end. A photograph of the setting under discussion gives the supplier a clearer reference for a change than an isolated overall measurement.
Reference products also need their own lines. Wubao’s padded shoulder strap lists an adjustable reference length of 80–142 cm. The adjustable nylon shoulder strap lists a 38 mm reference width and an 80–128 cm adjustable reference length. Choose the relevant starting product and describe the finished dimensions required for your bag.
Which tape will run through which hardware?
Put the tape width and thickness beside the opening dimensions of the proposed hardware. A routing sketch can show where the tape enters the adjuster, passes around it and finishes. Include both sides when the arrangement is difficult to understand from a front photograph.
Material, weave and tape thickness can affect adjustment locking. Review the tape against the hardware supplier’s width specification as a combination. Plastic hardware fitting guidance
The sample request should identify that combination. Try its adjustment through the required settings and record any requested change. If a different component is proposed, ask which tape and hardware will be supplied in the revised assembly. Keep any requested performance assessment as an agreed requirement with its method and acceptance criteria identified.
Finish matters alongside fit. A close-up can identify the hardware colour, surface appearance and orientation you want to discuss, while a full-strap photograph shows where that detail belongs.
Does the clip connect to the actual bag?
The attachment point deserves its own view. Mark the opening of the bag ring or other fitting, and show the surrounding space. Where a clip must sit beside a folded panel or seam, add a side photograph of the area. Bring that interface into the sample review.
For the trial assembly, choose the actions that matter to the intended product. These might include attaching and removing the strap, changing the length and checking its position on each side of the bag. Describe the result you want the reviewer to confirm for each action.
A sewn attachment also needs its position identified on the bag drawing. Attaching a separate component at a fabric edge differs from folding binding around that edge. Make the intended construction clear. Seam construction reference
The sewing team can review the proposed attachment using the intended assembly. Include a photograph of the attachment area and identify the material to which the strap component will be joined.
Where should the padding and logo sit?
Show the padded section on the finished layout with its requested dimensions and position. During fitting, review its placement at the shortest and longest settings. Mark the side intended to face the wearer so comments about the sample refer to the same orientation.
Artwork needs a similarly clear location. Place the logo or design on the drawing, show its reading direction and identify the visible area you want reviewed. Consider its position beside the adjuster and hardware when setting out the brief.
The padded shoulder strap page lists length, width, colour, logo and hardware as customization topics. Use those fields to start the discussion, adding your padding requirements and quantities. Confirm the combination requested for the project before approving it for the order.
A compact sheet for the sample request
The following is a suggested structure for your own brief. Fill it with the dimensions and references for the actual project. Leave a question visibly open when a detail still needs discussion.
| Decision | Information to supply | Review on the sample |
|---|---|---|
| Finished range | Minimum and maximum settings with marked endpoints | Both settings on the intended bag |
| Tape and adjustment | Tape dimensions, hardware openings and routing sketch | The complete tape and hardware combination |
| Bag connection | Ring opening and surrounding attachment area | Connection, removal and intended position |
| Padding and artwork | Dimensions, location, colour and orientation | Appearance in the carrying arrangement |
| Assortment | Quantity by version and requested packing | The sample representing each requested version |
Alongside the sheet, provide the estimated quantity and unit. Add the application, destination country and target date when available. Ask for the MOQ and lead time for the specified combination, including the assortment you expect to order.
Turn sample comments into an order decision
Give the drawing and artwork a revision reference, and identify the sample reviewed against them. Keep this record together at approval. It should show which details were accepted, which changes were requested and which final combination is being confirmed.
For a change, name the location and describe the desired result. A marked photograph or drawing can accompany that comment. When the updated sample is reviewed, return to those points and record the decisions in the consolidated specification.
Use the agreed names, units and version references in the purchasing paperwork. To begin, discuss your shoulder strap specification with Wubao using the drawing, reference bag photographs and quantity breakdown. Those materials give the conversation a practical starting point.