
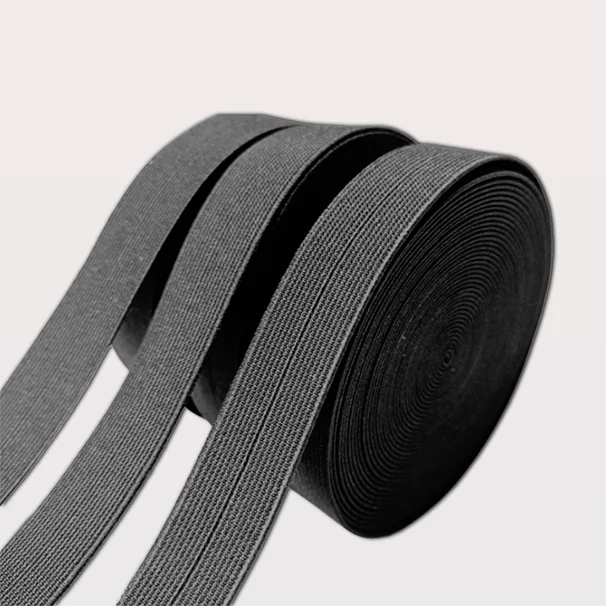
A fold over elastic binding inquiry needs to describe the tape and the finished edge separately. The open width belongs to the tape laid out across its face. The finished visible width belongs to the sewn item, viewed from the front or reverse. A third detail completes the picture. Everyone reviewing the sample needs to know whether the assembly was relaxed or held at an agreed extension.
That distinction is worth settling before a quotation turns into a sample request. A buyer may be thinking about the narrow border visible on a garment while a supplier is working from a full tape width. Put both dimensions on the same sketch and the conversation has somewhere useful to start.
What does the width on your drawing describe?
Begin with an outline of the finished item and mark the edge receiving the binding. Beside it, draw a short cross-section showing the fabric and the tape. Label the open tape width on a separate flat view. On the sewn view, mark the visible width on each face. Arrows and units belong beside the dimensions they describe.
A bound seam wraps a binding strip around the material edge and secures it with stitching. Bound seam construction
The drawing can stay simple. It needs to show which edges the stitching should catch, where the stitch line should sit and which side faces the customer. Different front and reverse requirements can be shown individually. The supplier can then discuss a tape and construction against the result you have drawn.
Keep a separate field for each requested width in the inquiry. A proposed conversion can be discussed for the particular construction, followed by measurements on its sample. The approved sewn result gives the purchase brief its finished-width reference.
A short inquiry can carry a very clear specification
Consider this illustrative brief. It uses blanks for the buyer’s own measurements and describes a proposed request for discussion.
We are sourcing binding for the marked edge on the attached garment drawing. Open tape width is [buyer entry and unit]. Required visible width is [front entry] on the outside and [reverse entry] on the inside. Please review the construction using fabric reference [buyer entry]. The sample will be checked in [agreed condition]. Quantity is [buyer entry and unit], divided between the attached colour references.
There is enough information here to identify the unresolved questions. Perhaps the front view is clear but the reverse still needs discussion. Perhaps the fabric reference is available while the colour remains undecided. Keeping those decisions visible is more useful than treating every blank as an agreed detail.
The same approach works when an existing garment is the starting point. A marked photograph can identify the location being discussed, with a small drawing beside it for the measurements that matter.
Bring the fabric into the sample conversation
The loose tape is only one part of this review. The buyer also has an intended edge, attachment arrangement and finished appearance. A piece of the actual fabric, or an identified material reference, gives the sample team that context.
Include the layers at the edge and any joining area that deserves attention. A sketch can show where a seam crosses the binding, where the binding ends and how those ends should meet. For a shaped edge, a marked pattern section helps identify exactly which area is under discussion.
In cuff and waistband applications, elastic length and its stretched state matter to the resulting assembly dimensions. Elastic application guidance
For the sample review, agree a condition with the people preparing and checking the assembly. Record that condition next to the measurement. If the same trim is proposed for several products, keep the relevant assemblies identifiable in the feedback so a comment about one fabric stays connected to that fabric.
A working sheet for the buying team
This suggested sheet gathers the information needed for a product discussion. The entries are requirements to complete or confirm. A measurement location, photograph or drawing can be attached wherever a short field needs explanation.
| Part of the brief | Buyer entry | Sample record |
|---|---|---|
| Product | Binding reference and intended item | Reference supplied for review |
| Open width | Full tape width, unit and condition | Measured result and location |
| Finished widths | Visible front and reverse dimensions | Results on the sewn assembly |
| Fabric | Material reference and marked edge | Assembly used for the check |
| Appearance | Colour reference and stitching position | Comments against the supplied reference |
| Supply | Total quantity, unit and packing request | Order conditions to confirm |
An undecided tolerance or extension requirement can remain an explicit question on this sheet. Where a measurable acceptance range is needed, it belongs in the discussion for that order, together with the intended checking method. The sheet can then carry the agreement reached by the buyer and supplier.
Use a product reference to narrow the inquiry
Wubao’s fold-over elastic binding product lists polyester and latex, a woven centre crease, and separate open-width and folded-width fields. Those fields provide a starting point for discussing your own dimensions. The product reference and your requested result can sit together in the brief.
Material preferences deserve their own entry. Identify a required composition or restriction when it forms part of the buying specification. The centre crease can also be marked on the drawing, alongside the face that should remain visible and the intended sewing arrangement.
For a project still at the product-selection stage, the woven elastic and binding range provides other references to discuss. Keep each proposed item identifiable so the sample comments can return to the correct product.
Turn sample feedback into a purchase decision
A useful review records three things separately. There is the measured result, the appearance observed on the assembly, and the change being requested. Keeping those apart gives the next conversation a concrete subject.
- Identify the sample. Match the product and drawing revision to the item under review.
- Measure the loose tape. Record open width, units, location and the agreed condition.
- Review the sewn edge. Check front and reverse dimensions on the intended fabric.
- Look at the marked details. Review crease placement, stitching, joins and the colour reference.
- Record the decision. Identify accepted features and mark each requested change on a photograph or drawing.
A comment such as “adjust the visible width at the marked curve to the drawing requirement” identifies a location and a desired result. It also leaves the rest of the sample available for a separate decision. Accepted details should stay visible in the feedback when another sample is requested.
Before an order is placed, bring the agreed specification, approved sample reference, quantities and packing request together. A change to the colour, dimensions or construction is a reason to confirm the relevant quotation and sample arrangement again.
Questions before requesting a sample
What if I only know the finished appearance?
Send the marked garment image or sketch and show the visible result you want. The open tape width and proposed construction can be discussed from there, followed by a sample using the intended fabric.
Which details should accompany the first inquiry?
Include the product reference, estimated quantity and unit, drawing and fabric information already available. Colour references and unresolved questions can accompany them. You can request a fold-over elastic sample with this product selected and use the working sheet to organise the review.